Getting started with Sales
By the end of this tutorial, you will have opened the module, put a sales team together, created a customer, priced a quotation, converted it into a purchase order, invoiced it, then cashed the settlement of your first sale.
Prerequisites
- The Products and Sales modules installed for your organization (see Activate modules)
- An Administrator profile on the module: the walk writes customers, documents and settlements
- At least one product in the catalog, with its name, its internal reference and its packaging — it is created in the Products module
Steps
1. Open the module
From the dashboard of your organization, under My applications, click the Sales card. The module opens on its Dashboard, or, if your profile does not open it, on the first screen it grants you.
The left menu gathers the eight sections of the module: Dashboard, Customers, Products, Sales, Collection, Teams, Reporting and Settings.
2. Put your sales team together
No document is written without a seller. Open Teams, click New team and give it its Name and its Short name, both required.
Then open the Sellers of the team: Add a seller picks a person among the contacts of your organization, Create a seller brings a new one to life without leaving the screen. A seller is removed from the team, or moved to another team, as your organization changes.
3. Check the selling price of your product
Open Products › Products and show the record of the one you are about to sell. Its Pricing sets the price: a fixed price, or quantity intervals each carrying its own, the amounts including the taxes or not.
On the same record sit the Taxes of the product, its Discounts, its Special prices per customer and its Prices per point of sale.
No price, no fair sale
A product without pricing goes out at zero on your documents. Set its price before selling it, rather than fixing every line by hand.
4. Create your customer
Open Customers and click New customer. The module asks you to choose the contact to turn into a customer among those of your organization. If yours does not exist yet, Create a person or Create a company writes it on the spot, then turns it into a customer right away.
Its record then opens on the summary of its purchases — Total, Paid, Left to pay — and on what you grant it: its Reference, its discounts, its special prices and the taxes you exempt it from.
5. Price a quotation
Open Sales › Proforma invoices and click New proforma invoice: that is the quotation you send to the customer. Fill in the Seller and the Expiration date, both required, then the Customer, the Issue date and, if the quotation carries them, the Description and the Terms and conditions.
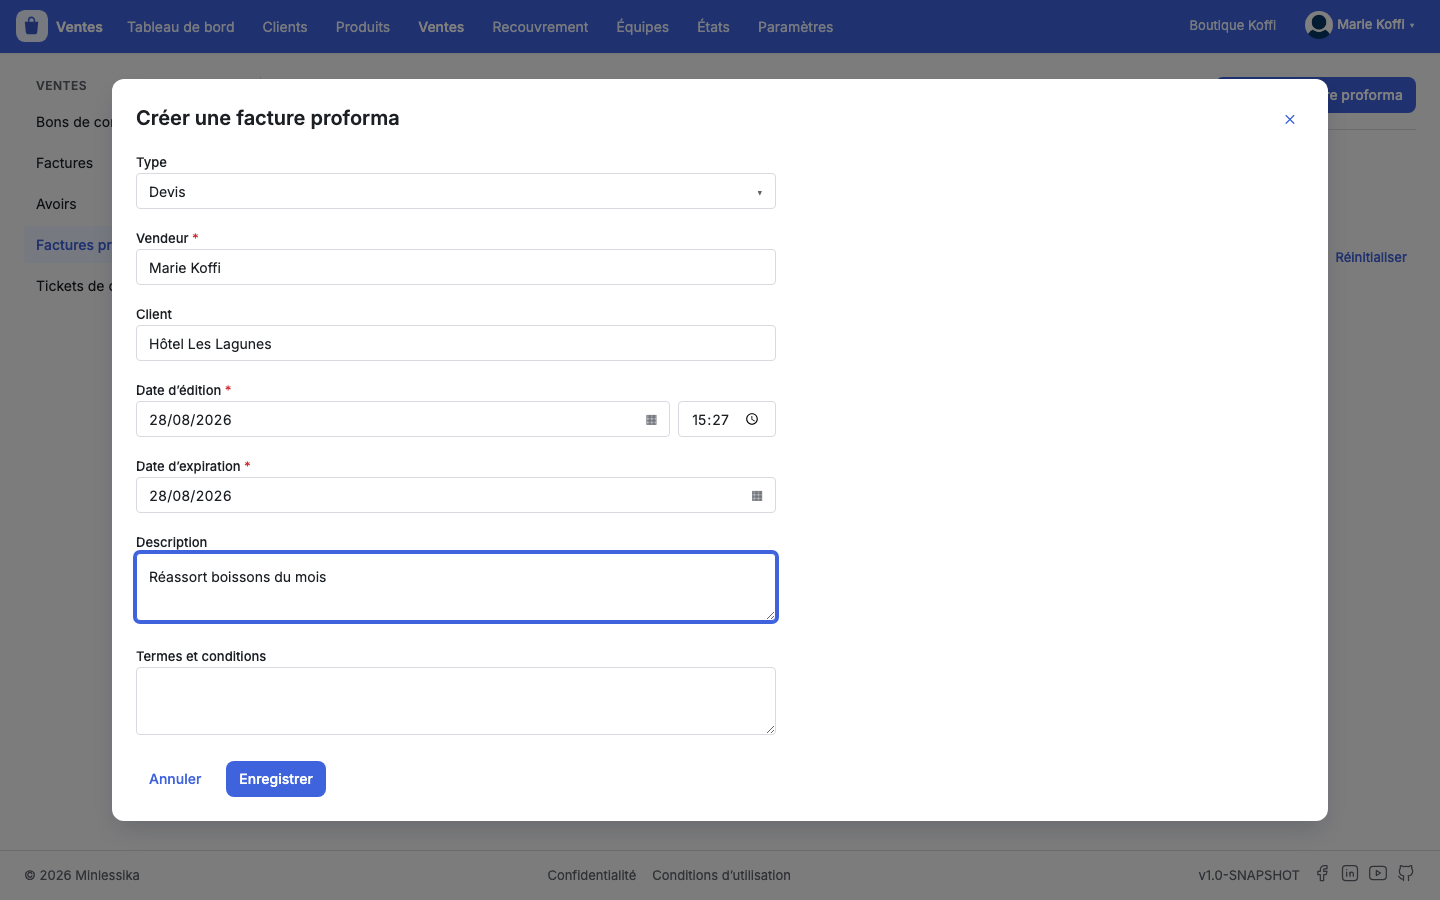
Create the quotation, then, on its record, Add a line per product sold: the Product, the Quantity, the Unit price and the Discount. The module works out the Net commercial, the Taxes and the Total with taxes; you set no amount yourself.
6. Send the quotation and have it accepted
Send marks the quotation as gone to the customer. On their answer, Accept or Reject: the status of the quotation follows, and Print draws at any moment the document to attach.
7. Convert the quotation into a purchase order
On the accepted quotation, click Convert into a purchase order. The module writes the order with the customer, the seller and the lines of the quotation, and the order remembers its Source quotation.
Complete what the quotation did not carry: the Payment condition, the Delivery delay, the Customer order reference, the Billing address and the Delivery address.
8. Confirm the sale
Click Confirm the sale — the module asks you to confirm. It is this action that commits the order: its lines are no longer freely rewritten, and invoicing opens up on it. Reopen steps back as long as nothing has been invoiced.
9. Generate the invoice
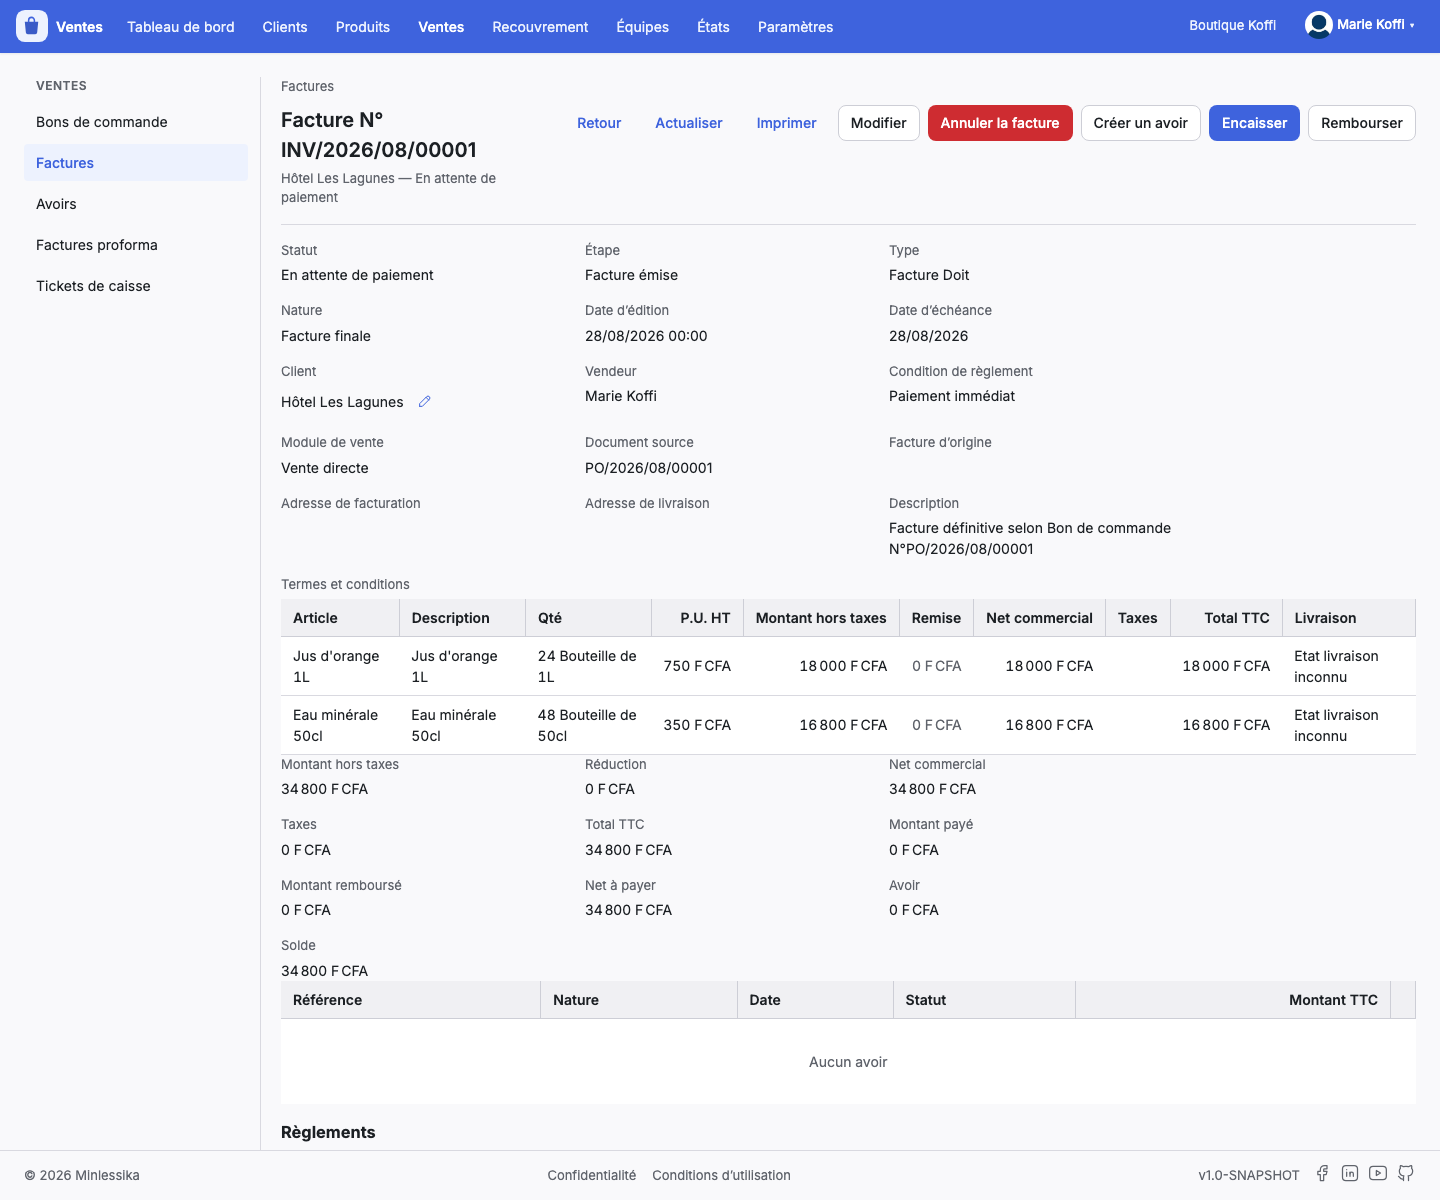
Still on the order, click Generate an invoice. Choose its Kind of invoice — Final invoice, Down payment, Advance, Situation or Balance invoice —, check the Issue date, the Due date and the Payment condition, then confirm: you land on the invoice.
On its record, Validate settles it for good. The invoice then joins the Invoices of the order, and its due date the Deadlines of the module.
10. Cash the settlement
On the invoice, click Cash. The module recalls the Left to pay, then asks you for the Payment date, the Object, the Payment mode and the Amount paid; the modes travelling through a third party also require the Transaction reference. Click Pay.
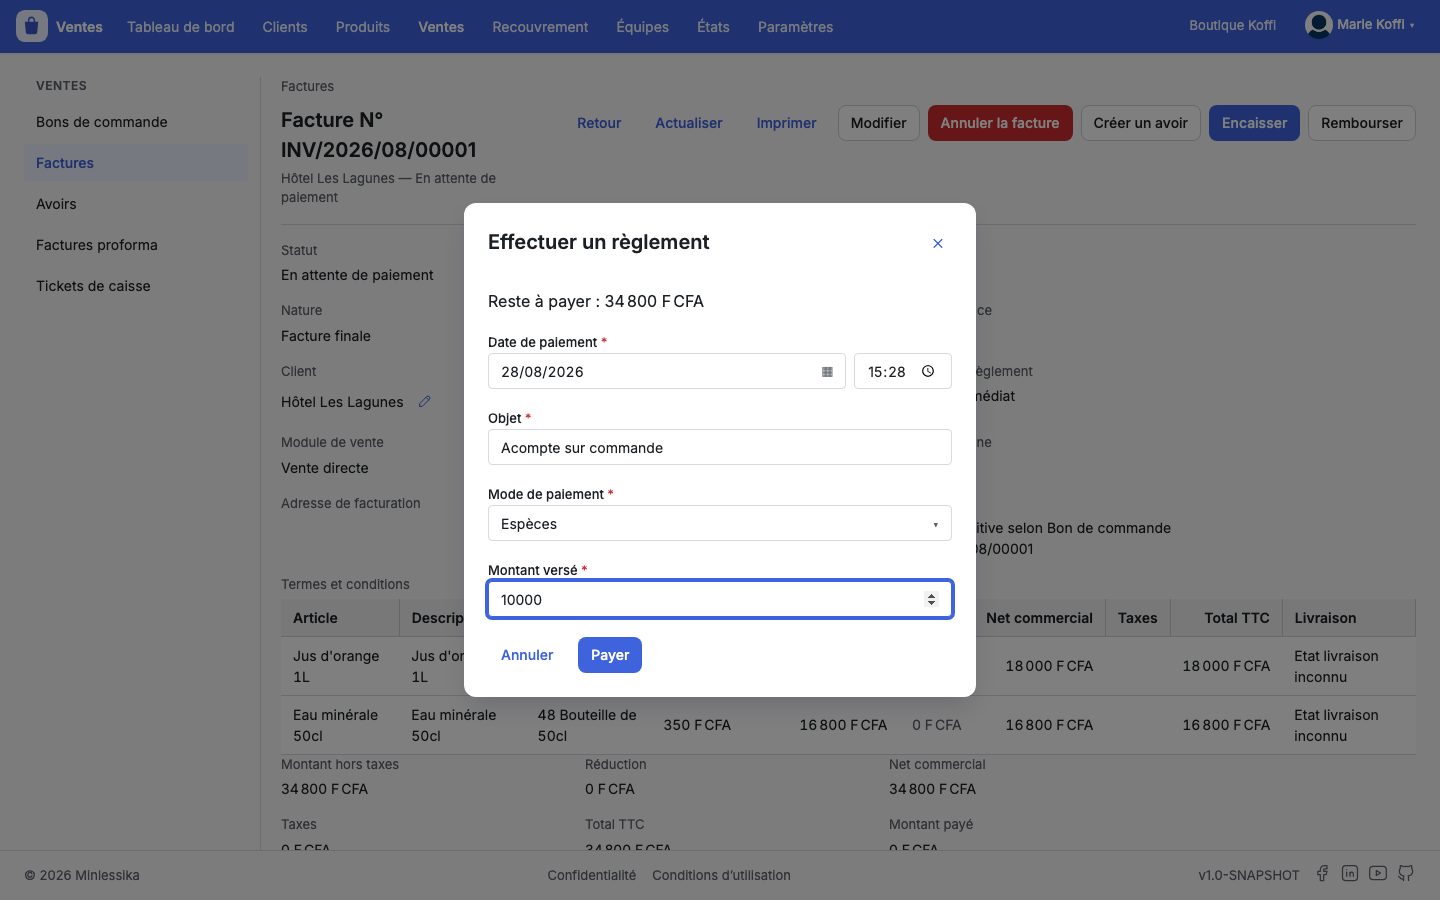
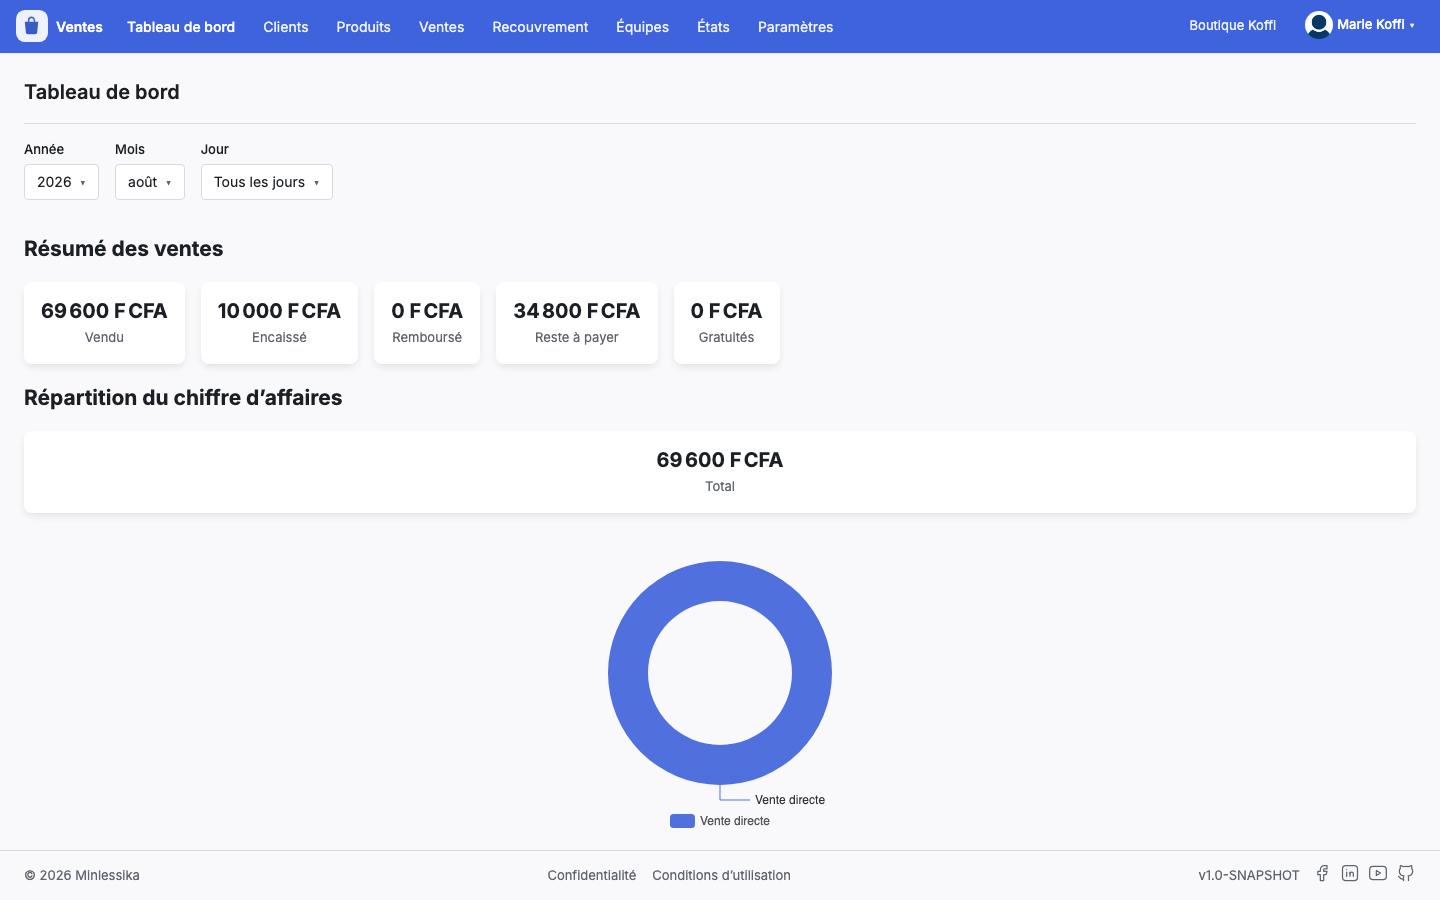
The settlement joins the Settlements of the invoice, the Net to pay goes down by as much, and Collection › Deadlines stops claiming what the customer has settled. The Dashboard counts your sale in the Cashed of the period.
Going further
Changelog
- 1.0 (August 27, 2026): document created.