Organize a warehouse
A warehouse is only an address; it is its locations that hold the stock. This guide shows how to read your warehouses, create the locations that divide them, and organize them into aisles and shelves without breaking your quantities.
Prerequisites
- The Inventory module activated for your organization
- The
STOCKS.WAREHOUSE.READpermission to read,STOCKS.WAREHOUSE.WRITEto write - A warehouse picked in the selector of the top bar
Steps
1. Open the list of warehouses
Open Warehouses. The table gives the Full name, the Short name, the number of Locations and the number of Operation types of each one. It is read-only: warehouses are neither created nor changed from this screen. On a row, the View the locations action leads to what interests you here.
One warehouse at installation
The module creates the Entrepôt principal (main warehouse) when it is installed. If your organization has only one, the selector of the top bar is not shown.
2. Tell internal locations from virtual ones
Two natures of location live side by side:
- internal locations belong to a warehouse: they are your aisles, your shelves, your cold rooms, and they alone truly hold stock;
- virtual locations belong to no warehouse: they stand for the outside world. The module creates three of them at installation — Emplacement fournisseur (supplier location), Emplacement client (customer location) and Perte d'inventaire (inventory loss). They are shown everywhere as virtual locations.
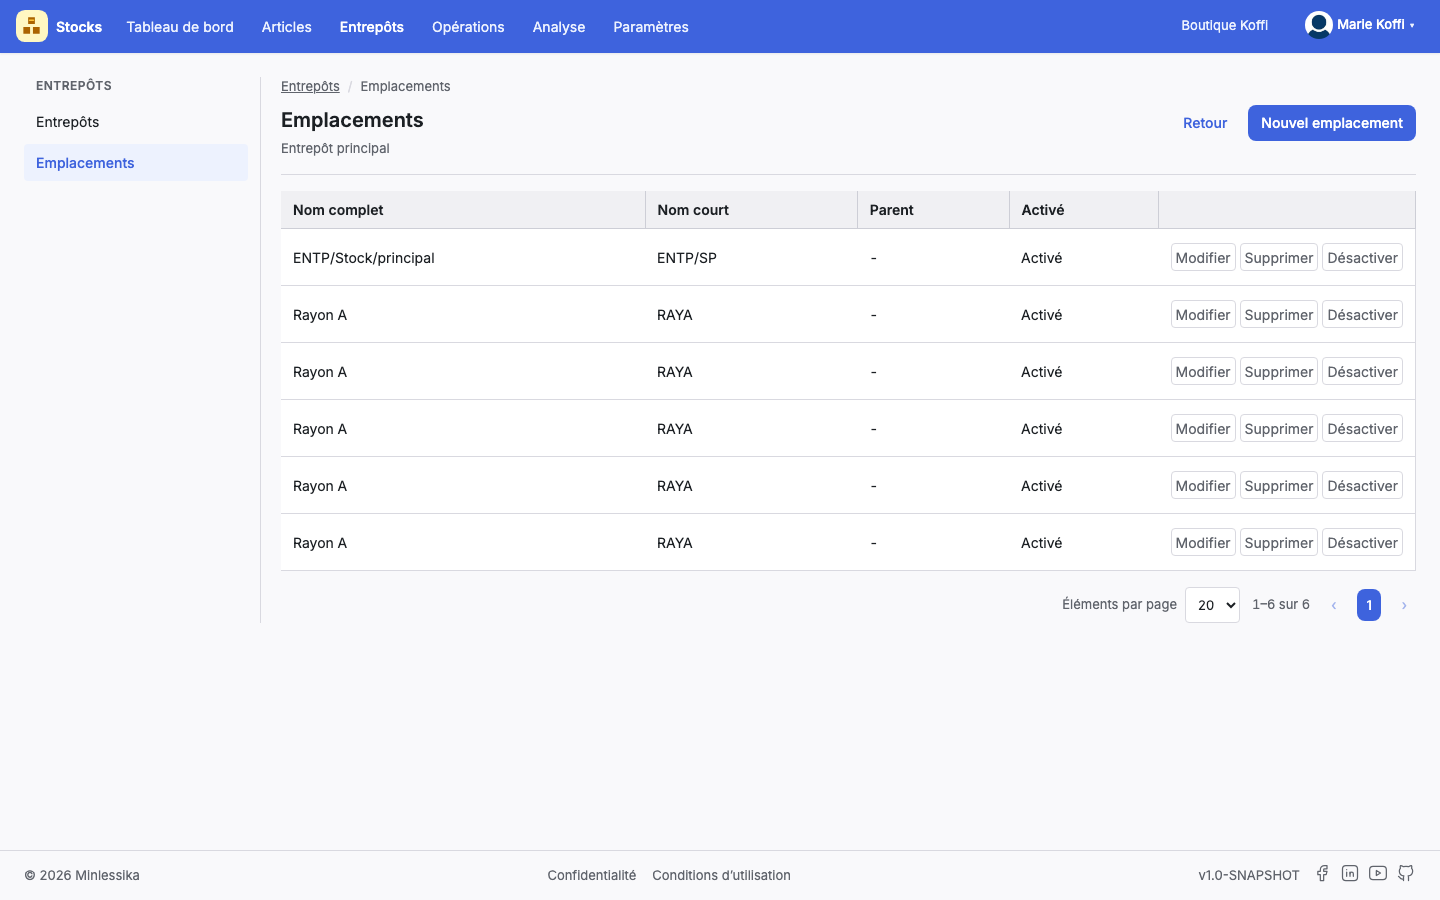
The Locations screen shows and creates only the internal locations of the current warehouse. The virtual ones appear in the drop-down lists of the operations and of the operation types.
3. Create a location
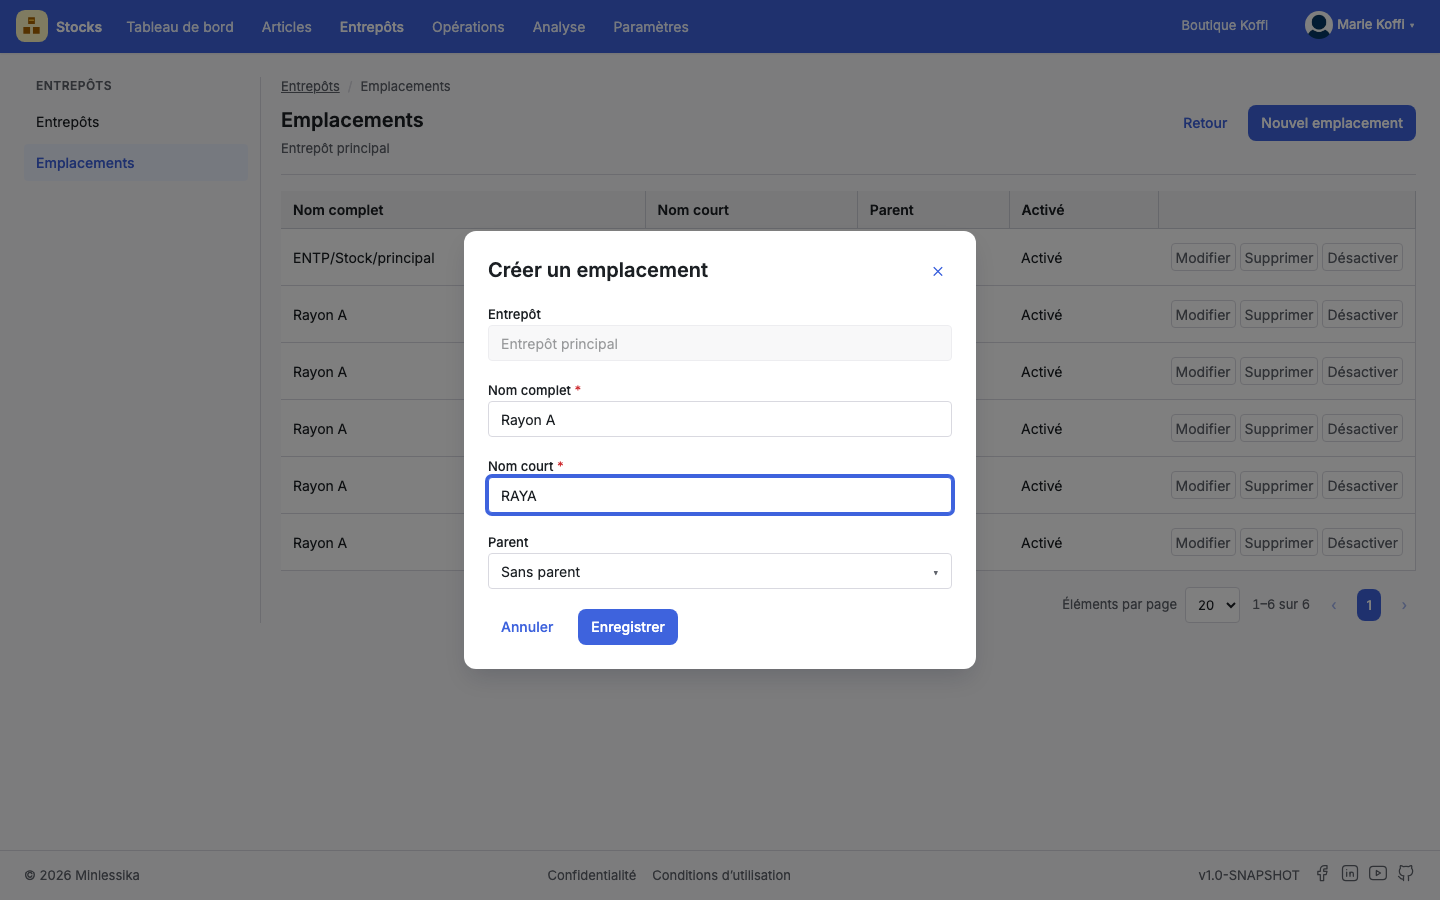
On Locations, the New location button opens the Create a location dialog:
- Warehouse — displayed, not editable: it is the current warehouse;
- Full name — mandatory;
- Short name — mandatory, it is the one narrow tables show;
- Parent — No parent by default.
Both names are required
The form reports "Full name is a required field" and "Short name is a required field"; the server answers on its side "You must provide the label" and "You must provide the short name".
Every location created opens a stock row at zero for all the items of the catalog.
4. Attach a location to a parent
The Parent field builds the hierarchy: an aisle carries its shelves, a shelf its racks. Four rules protect it, and the module enforces them in its own words:
- only an internal location can have a parent — "Only internal locations can have a parent";
- a parent must itself be internal — "The parent must be an internal location";
- a location that holds available stock cannot receive children — "The parent holds available stock";
- a location cannot be its own parent — "A location cannot be its own parent". The drop-down list therefore never offers itself.
Empty before you group
The third rule is the surprising one. Decide on your layout before filling your locations: a shelf already loaded will refuse to become the parent of racks. Its stock must be transferred elsewhere first.
5. Edit, activate, deactivate, delete
Each row of the table — Full name, Short name, Parent, Active — carries four actions: Edit, Delete, Activate and Deactivate. A deactivated location stays visible with the Inactive state.
A location that has served is no longer deleted
As soon as an operation has taken it as a source or as a destination, the module refuses: "Operations have already been recorded on this location". Deactivate it instead.
6. Understand what a parent changes for the stock
A parent location stores nothing itself: the quantity it shows is the sum of those of its children, recomputed as soon as a movement touches one of them. It is your summary view, aisle by aisle.
Two limits follow, visible at the time of the operations:
- a parent location can never be the destination of an operation — "A parent location cannot serve as the destination of an operation": goods are put away on a rack, not in an aisle;
- neither can it be the source — "A parent location cannot serve as the source of an operation" —, with one exception: exits towards a customer, which then draw from the child locations.
What next?
Changelog
- 1.1 (August 19, 2026): screenshots added.
- 1.0 (August 18, 2026): document created.